Offline Internet
A project I have wanted to for a long time is setting up an "offline Internet", or "Internet-in-a-box", which is an offline "library" and a wireless access point that nearby devices can connect to. To do this I used a Raspberry Pi 4 with the official Raspberry Pi OS installed.
The main steps in creating this "Internet-in-a-box" is:
- Download the desired content
- Install software for serving content
- Setting up the Pi to broadcast its own WiFi-network
I assume that the operating system already is installed on the Raspberry Pi (or any similar device).
Scroll down to the bottom of the post to see screenshots from the offline Internet!
Download the desired content
Many types of static content (HTML, plain text, pictures etc) can be served from the Raspberry Pi. For me, the most useful content is this:
- Wikipedia (English). On this link you can find several versions of Wikipedia, in various languages and topics. If you want the complete English Wikipedia, download this version (it is 79 GB).
- Project Gutenberg. This is a large collection of books from the public domain, which means that it can be downloaded for free. Different version can be found here.
- Code documentation. I also have downloaded the documentation for the main programming languages and frameworks I use on a daily basis. This type of content can usually be downloaded in a variety of formats. I choose HTML-format if it is available, since I find it easiest to access in a browser (and some documentation in HTML-format also include a search engine). Examples:
Other content can be found here.
Install software for serving content
I use two different ways of serving the content wirelessly to other devices,
one for the .zim-files, and another one for other file types.
Serving .zim-files
For serving .zim-files, I use software called Kiwix. First I download Kiwix
from this link (if you use a
Raspberry Pi like me, choose the version called "GNU/Linux ARM 32-bits").
Unpack the zipped file with
tar -xvzf kiwix-tools_linux-armhf-3.1.2-4.tar.gz
Your version number might be different though. The contents are unpacked to a
folder with the same name as the zipped file. I rename this folder kiwix to
make things easier, and then move all my downloaded .zim-files to this
folder. If you for example download a file called wikipedia.zom and another
file called gutenberg.zim, the folder should look like
kiwix/
├── gutenberg.zim
├── kiwix-manage
├── kiwix-read
├── kiwix-search
├── kiwix-serve
└── wikipedia.zim
First you need to make a library containing your .zim-files:
./kiwix-manage library.xml add gutenberg.zim
./kiwix-manage library.xml add wikipedia.zim
This library can now be served by running:
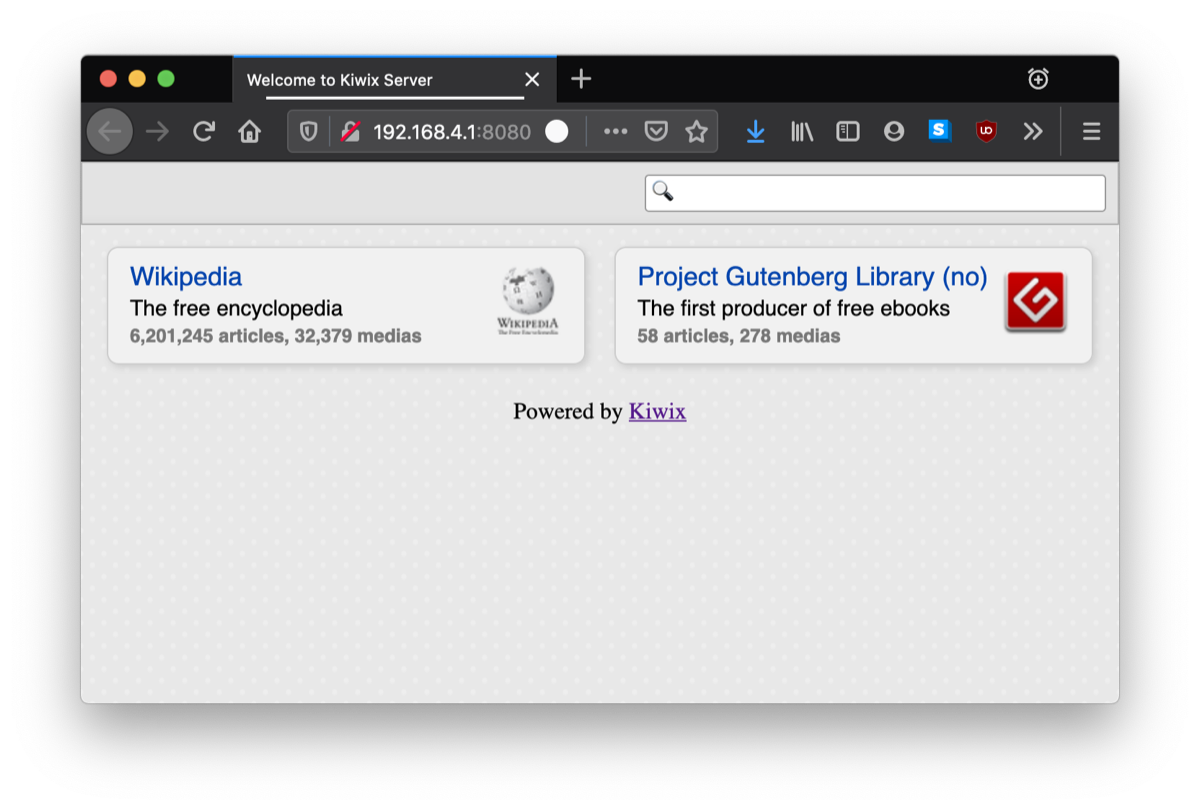
./kiwix-serve --port=8080 --library library.xml
Go to localhost:8080 in the browser of the Raspberry Pi to see the content.
If the Raspberry Pi is connected to a WiFi-network, you can view the content
from other devices by going to [Local IP of the Pi]:8080 in the browser
(first you need to find the local IP address of the Pi).
Serving other type of content
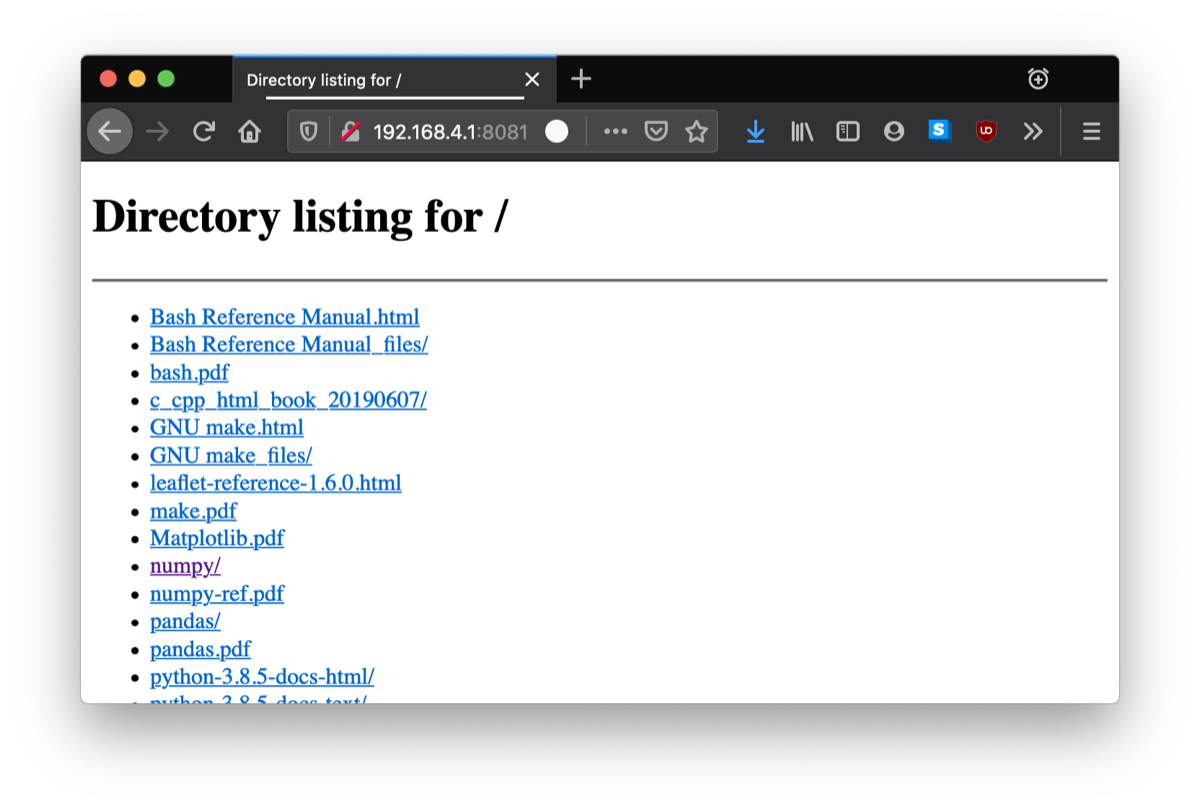
For all other file formats I use a Python webserver to serve the content (which of course requires that you have Python installed on your system). This simply means that I run the following command in the folder containing the files I want to serve:
python3 -m http.server 8081
In this case I have chosen to serve on port 8081, but this can be any other port (if you omit the port number, it will be set to 8000) as long it's not the same as the other servers you have set up.
Go to localhost:8081 in the browser of the Raspberry Pi to see the content.
If the Raspberry Pi is connected to a WiFi-network, you can view the content
from other devices by going to [Local IP of the Pi]:8081 in the browser
(first you need to find the local IP address of the Pi).
Make server start automatically
In order to make the file serving start automatically when I boot the Pi, I simply add cronjobs. Add cronjobs by editing the crontab file:
crontab -e
Add the following files to the bottom:
@reboot /path/to/kiwix/kiwix-serve --port=8080 --library /path/to/kiwix/library.xml
@reboot python3 -m http.server --directory /path/to/files/ 8081
Now these commands will run every time you boot up the Pi.
Setting up the Pi to broadcast its own WiFi-network
(The instructions in this section were found in the Raspberry Pi documentation for using the Pi as a routed wireless access point).
After the content is ready to be served from the Pi, one has to make the Pi broadcast its own WiFi. By doing this, any device nearby can connect to the WiFi and access the Pi's content. If you already have a router that all your devices are connected to (including the Pi), you can skip this step.
I used the below commands to make the Raspberry Pi broadcast its own WiFi network.
Install access point software:
sudo apt install hostapd
Enable the accesspoint service and make it start on boot:
sudo systemctl unmask hostapd
sudo systemctl enable hostapd
Provide network management services:
sudo apt install dnsmasq
Utility for firewall rules:
sudo DEBIAN_FRONTEND=noninteractive apt install -y netfilter-persistent iptables-persistent
After installing the software above, I edited the configuration file for
dhcpcd:
sudo vim /etc/dhcpcd.conf
These lines were added to the end:
interface wlan0
    static ip_address=192.168.4.1/24
    nohook wpa_supplicant
The Pi will be reachable in the IP address 192.168.4.1 after the setup
process is complete, and you are connected to the WiFi of the Pi.
Then I created the hostapd configuration file:
sudo vim /etc/hostapd/hostapd.conf
country_code=<COUNTRY CODE>
interface=wlan0
ssid=<NAME OF NETWORK>
hw_mode=g
channel=7
macaddr_acl=0
auth_algs=1
ignore_broadcast_ssid=0
wpa=2
wpa_passphrase=<PASSWORD>
wpa_key_mgmt=WPA-PSK
wpa_pairwise=TKIP
rsn_pairwise=CCMP
In my case, <COUNTRY CODE> was NO because I live in Norway, and one also have
to fill in a name for the network and password.
After a reboot (sudo systemctl reboot) the Raspberry Pi will broadcast its
own WiFi network, and you can connect to it using the name and password
specified in the hostapd.conf file.
Conclusion
After these tree steps are done, you can connect to the Pi's network using
WiFi, and access the content on 192.168.4.1:8080 or any other port number
that you have chosen to serve your files on. I find this useful both to limit
data usage, but also because I like to work offline if I do not strictly need
to do specific things online.